Step 1: Obtain Your API Key
- Navigate to Main Menu > Settings > API Setup page.
- Users can view and copy the existing API Token
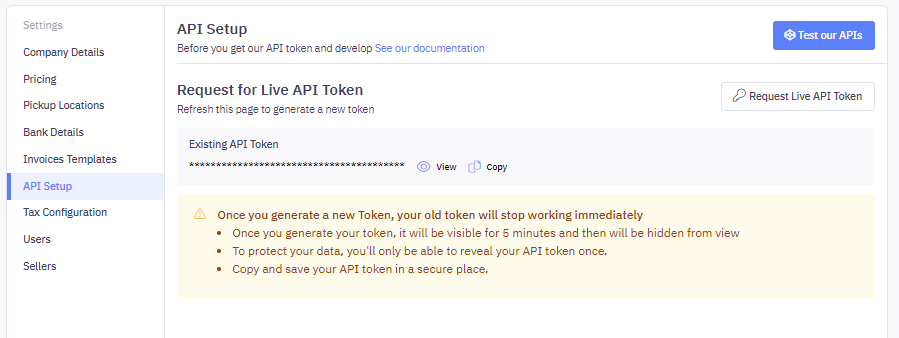
- Users can also click on “Request Live API Token” that refreshes the old token with a new token
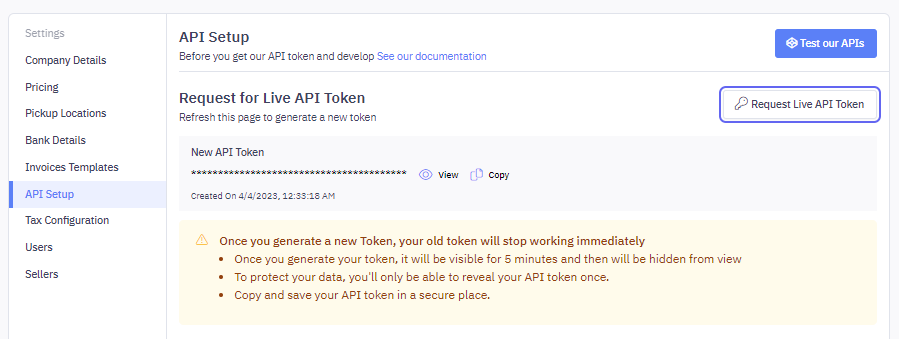
Once you generate a new Token, your old token will stop working immediately
- Once you generate your token, it will be visible for 5 minutes and then will be hidden from view
- To protect your data, you’ll only be able to reveal your API token once.
- Copy and save your API token in a secure place.
How can I test Delhivery One APIs?
You can read API documentation by logging in to Delhivery One and visiting https://ucp.delhivery.com/developer-portal/v1/execute
Please refer to this article on Client Developer Portal
Step 2: Connecting Your Account
Once you have your API Key:
- Log in to your Synctrack Returns dashboard.
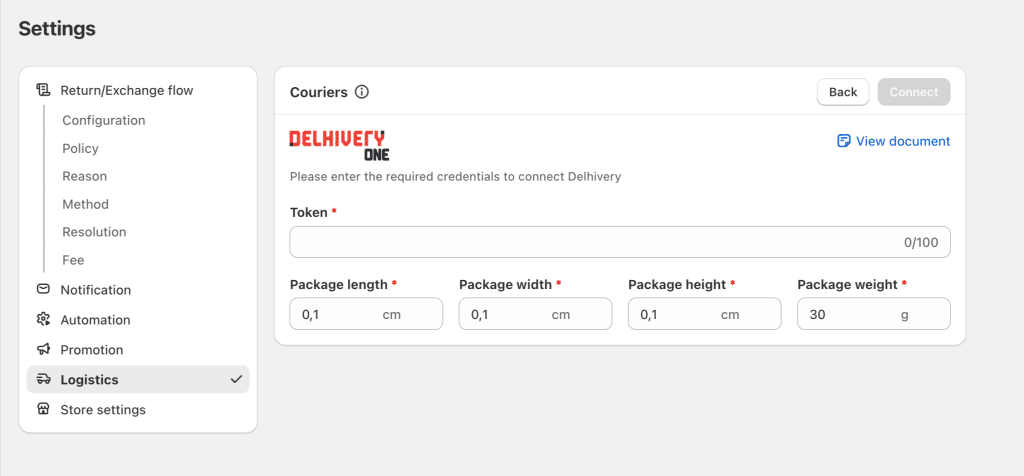
- Navigate to the “Settings” section > “Logistics” tab
- Look for the Delhivery integration option and click “Connect” or “Set up”.
- You’ll be prompted to enter your API Key. Paste the key you received into this field.
- Click “Connect” to establish the connection.
Step 3: Configure Settings
After connecting:
- Set your default package sizes and types.
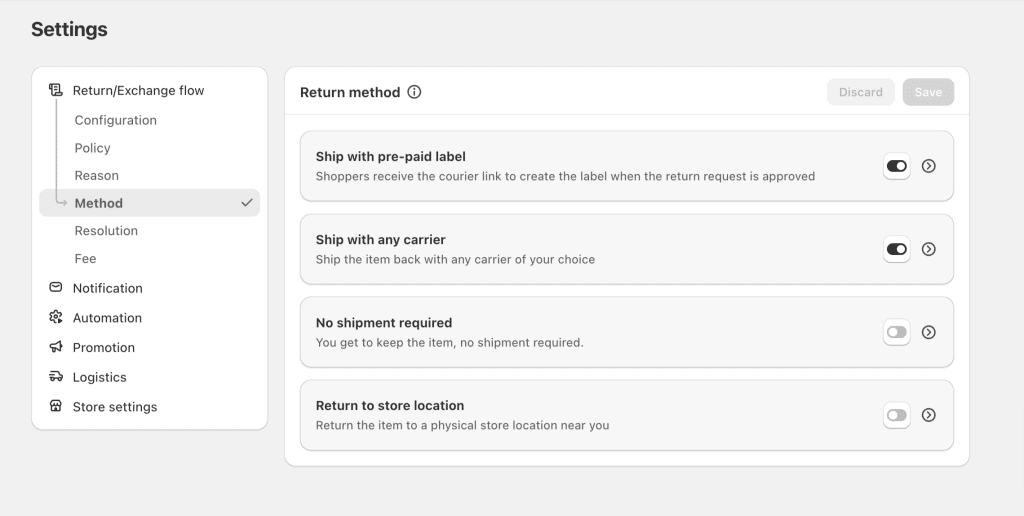
- Make sure method “Ship with pre-paid lable” is enabled
Step 4: Test the Connection
Before going live:
- Create a test return request on return page
- Choose “Ship pre-paid label” for return method (This method is only displayed on return page if you enable it in the app as the step above mentioned)
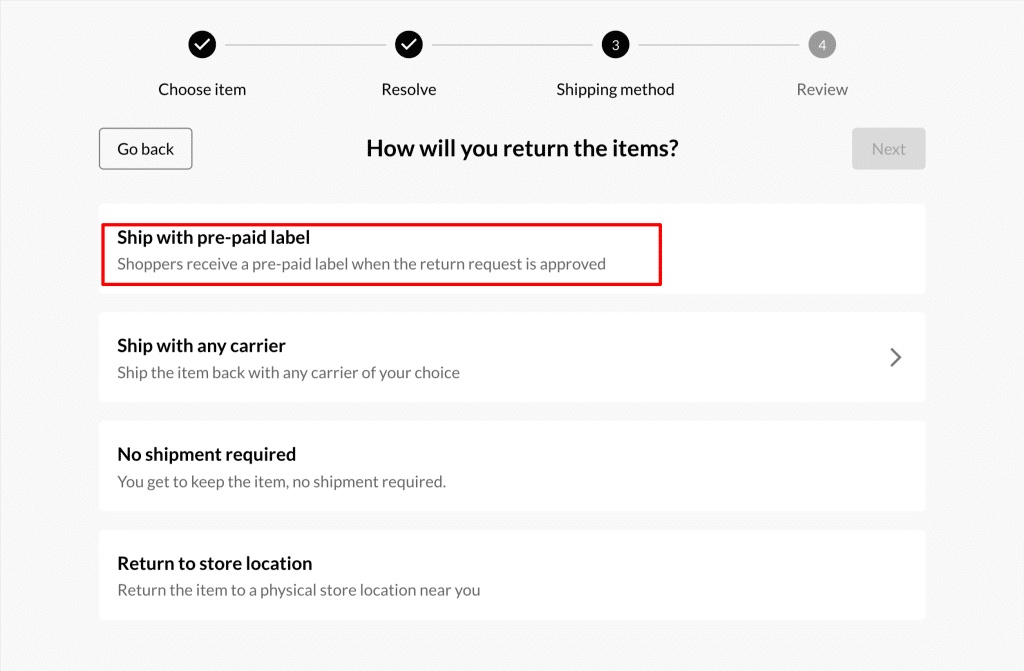
- Submit request
- Go into the app, open this request at tab “Return management”
- Click to approve the request & Select the appropriate shipping carrier if prompted.
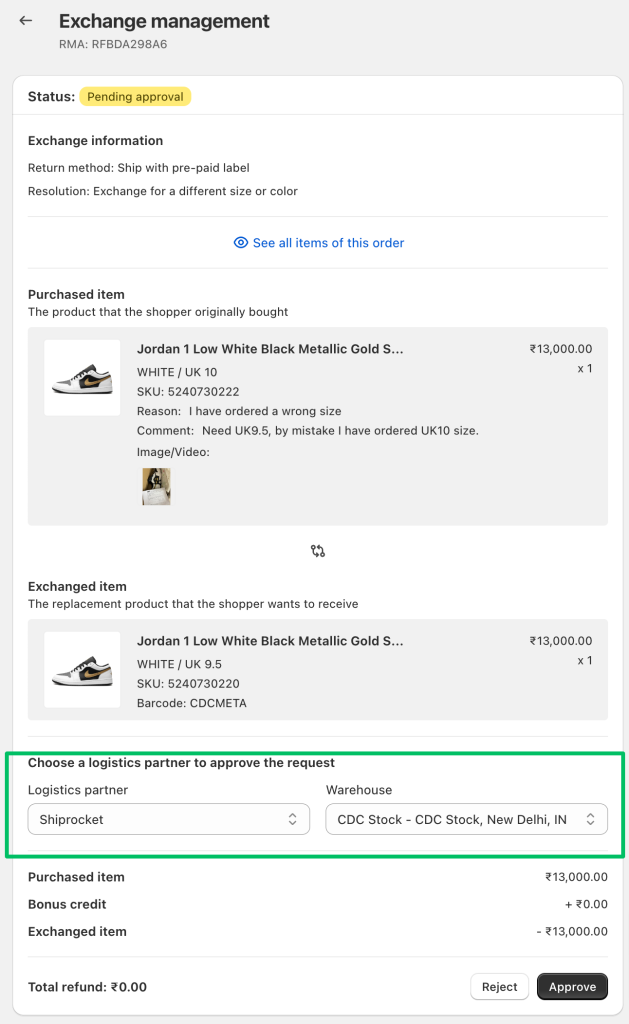
- Verify that the label is created correctly and contains accurate information.
- For more info of How to create and print return labels, click here