Step by step to connect with FedEx.
Create a FedEx API Project
- Login to the FedEx Developer account

- Go to “My Projects” > “Create an organization”
After you create an organization, you have “Manage Organization” tab like that:

- Then, click “My Projects” > “Create a project”


- Enable APIs to create a project and choose the “NEXT” button.


- Click on the “CREATE” button to confirm details.


Then, you can get “API KEY”, “ACCOUNT NUMBER” and “SECRET KEY” to connect with FedEx in the Synctrack Returns & Exchanged app.
API KEY, ACCOUNT NUMBER, and SECRET KEY must be created during production. If you use “Test Key”, you can not connect FedEx in the app. Please switch to “Production Key” and follow the instructions.


If you already have a Fedex project, please check if your project has added this Ship API. To create a label, your project must add Ship API.

Connect with Synctrack Returns
- Once you have your API Key:
- Log in to your Synctrack Returns dashboard.
- Navigate to the “Settings” section > “Logistics” tab
- Look for the AustraliaPost integration option and click “Connect” or “Set up”.
- You’ll be prompted to enter your API Key. Paste the key you received from AustraliaPost into this field.
- Click “Connect” to establish the connection.

Configure Settings
After connecting:
- Set your default package sizes and types.
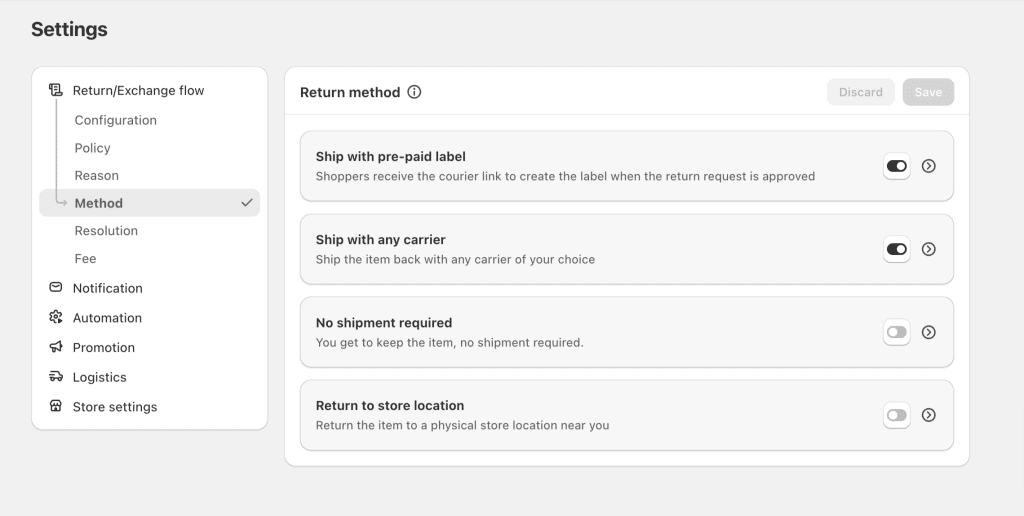
- Make sure method “Ship with pre-paid lable” is enabled

Test the Connection
Before going live:
- Create a test return request on return page
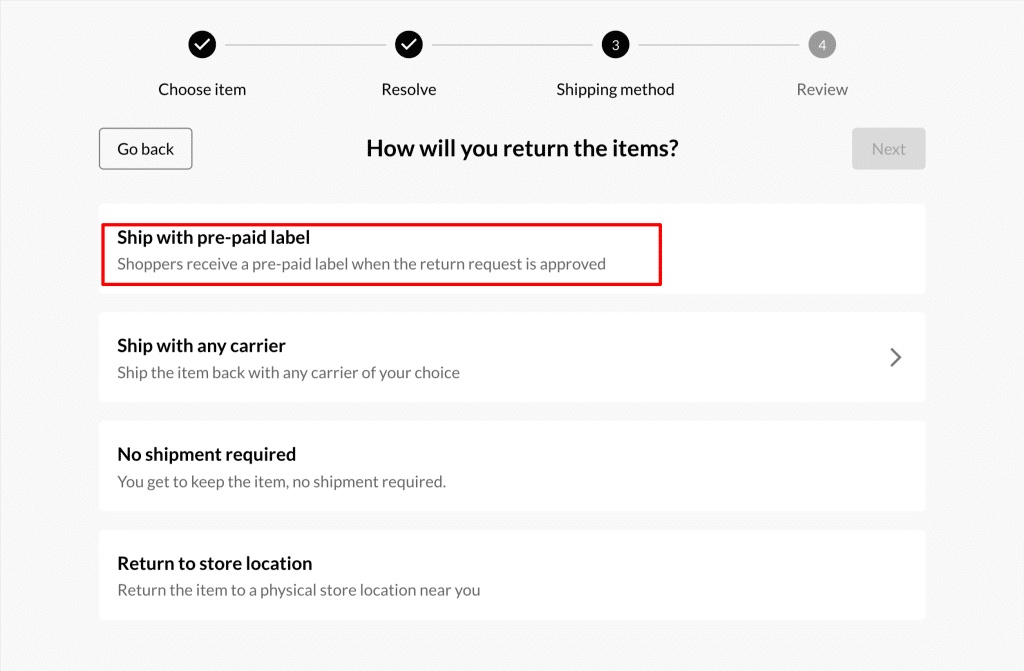
- Choose “Ship pre-paid label” for return method (This method is only displayed on return page if you enable it in the app as the step above mentioned)

- Submit request
- Go into the app, open this request at tab “Return management”
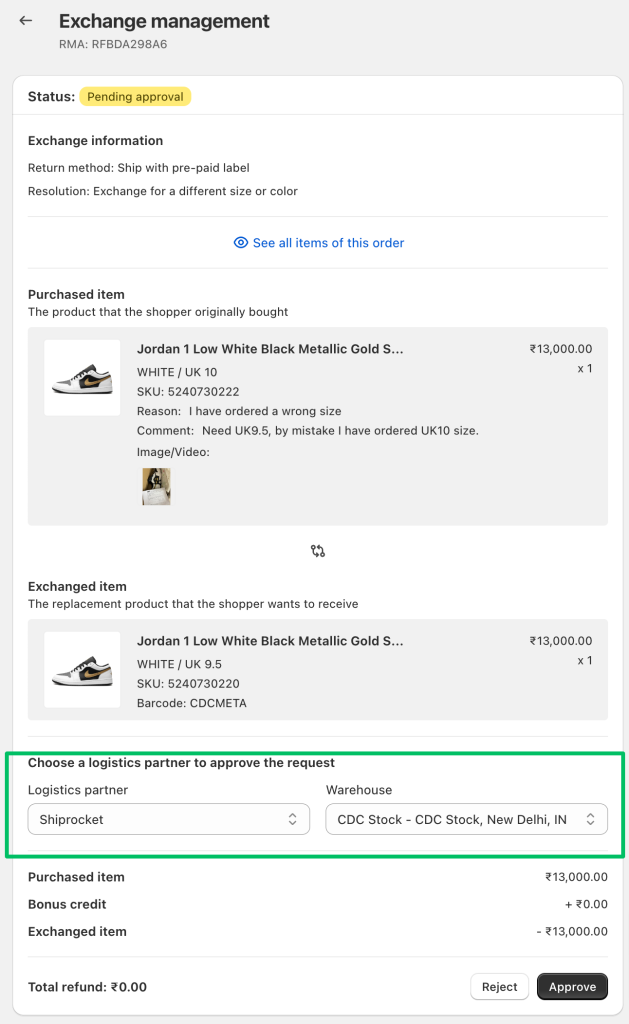
- Click to approve the request & Select the appropriate shipping carrier if prompted.

- Verify that the label is created correctly and contains accurate information.
- For more info of How to create and print return labels, click here