This guide will walk you through the process of setting up shipping carriers and integrating your shipping accounts within our return management system. There are two methods to achieve this: direct connection and approval-based connection.
Step 1: Enable Ship Prepaid Label
- Navigate to “Settings” in your dashboard.
- Select “Return/Exchange Flow”.
- Find the “Return Method” section
- Enable the “Ship Prepaid Label” option.
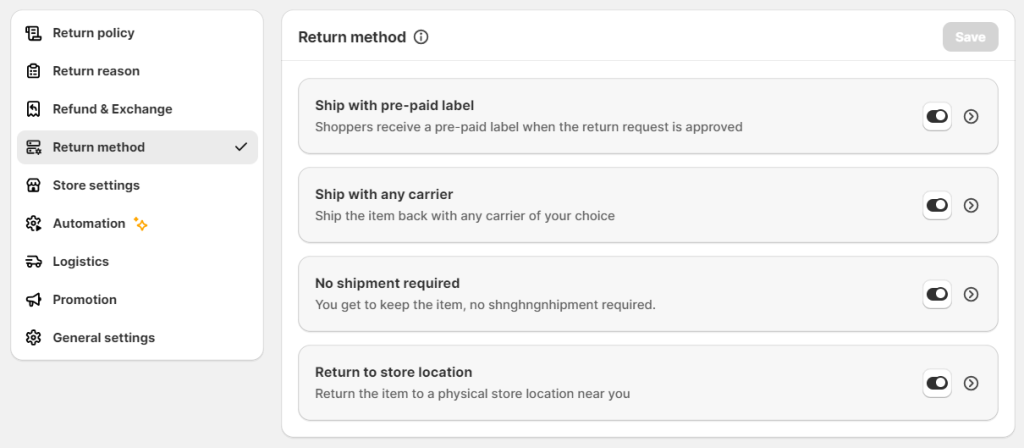
Step 2: Connect/ Add your warehouse address
Click button Sync from Shopify or Create new to add warehouse manually
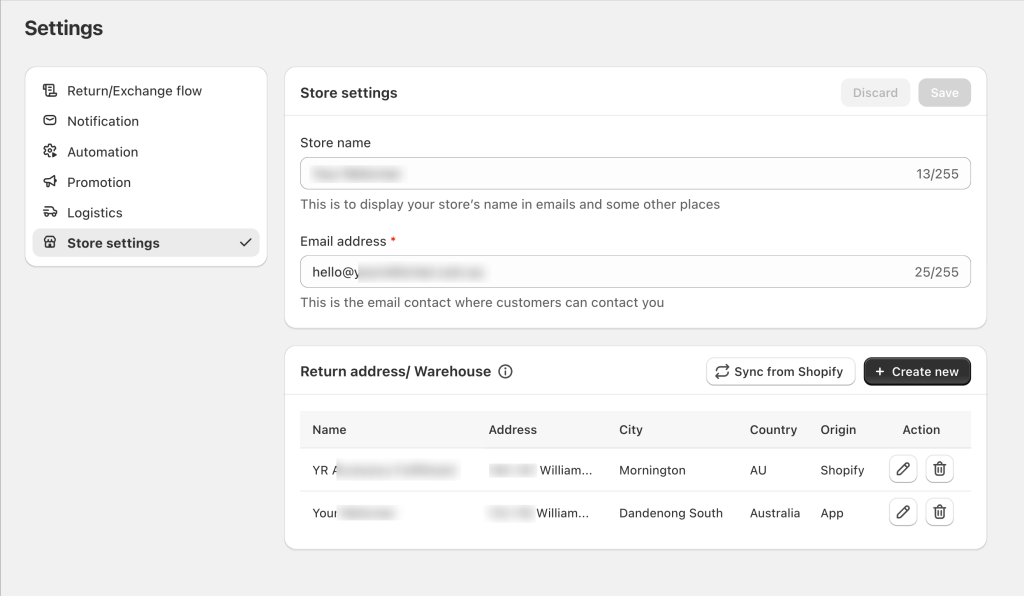
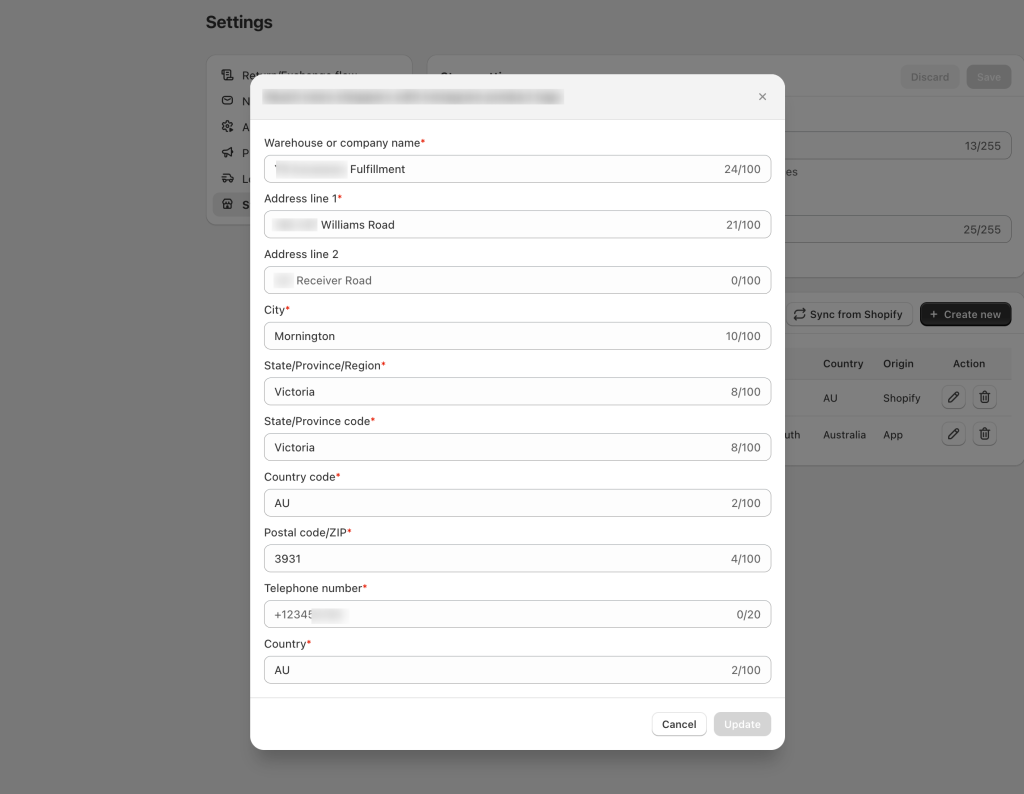
Ensure that all fields of this address exactly match the address in your logistics carrier account. This includes:
- Company name
- Street address (line 1 and line 2 if applicable)
- City
- State/Province
- Postal/ZIP code
- Country
- Phone number
Step 3: Connect Logistics
Go back to “Settings”.
Look for and select “Logistics”
Choose the carrier you want to integrate (e.g., FedEx, Australia Post, EasyPost, Shiprocket, Shippo)
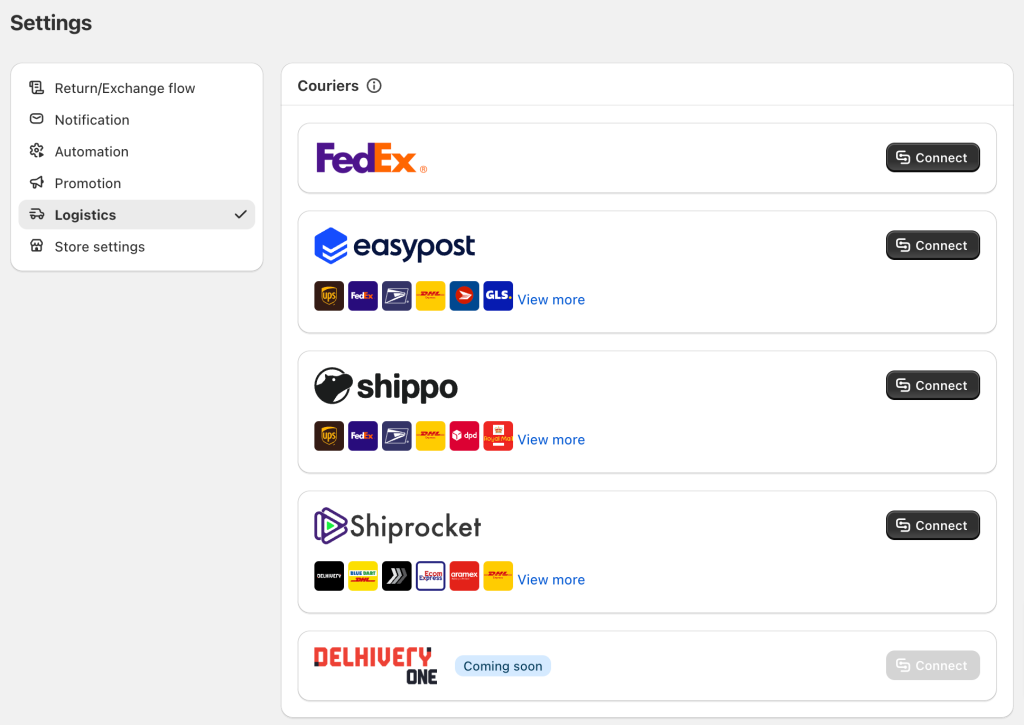
Follow the prompts to enter your account credentials for the selected carrier.

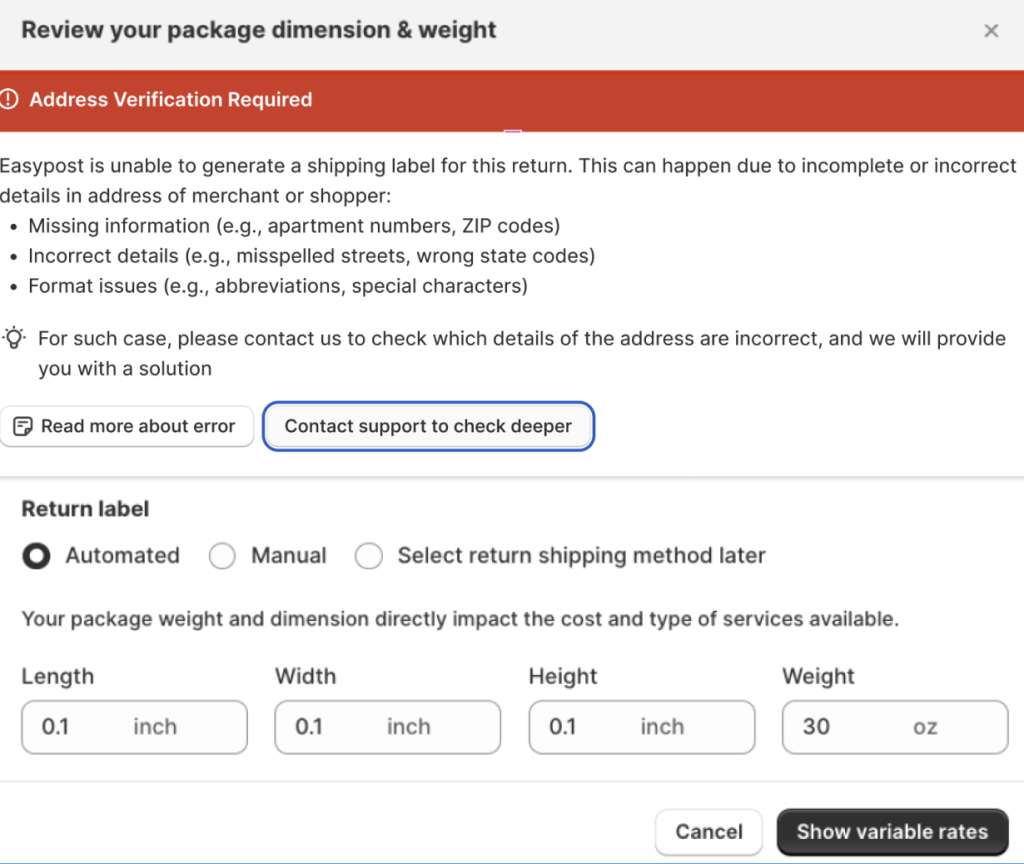
- If you receive errors when trying to create a label for a return request, first check the address matching:
- Compare each field of the address in our system with your carrier account.
- Look for any differences in spelling, punctuation, or formatting.
- Update any mismatched fields in our system to exactly match your carrier account.
Important Notes:
- Exact address matching is critical. Even minor discrepancies can cause label creation errors.
- Regularly verify that your address information remains consistent between our system and your carrier account.
- If you update your address with the carrier, remember to update it in our system as well.
- Some carriers may have specific formatting requirements for addresses. Ensure you follow these in both systems.
Frequently Asked Questions
Setting up shipping carriers and account integration
- Why I got error to generate a return label?
Read this article to know more about these errors
- How can I test my carrier integration?
- Create a test order in Synctrack.
- Attempt to generate a shipping label for this order.
- Check that tracking information is being updated properly.
- What should I do if I encounter an error during carrier integration?
- Double-check that all entered information is correct.
- Ensure your carrier account is active and in good standing.
- If the problem persists, contact Synctrack support for assistance.
- How do I integrate a 3PL provider like EasyPost or Shippo?
The process is similar to integrating a direct carrier:
- Go to the carrier integration section in Synctrack.
- Select the 3PL provider you want to integrate.
- You’ll be prompted to enter your 3PL account details, which usually include an API key or token.
- Follow the on-screen instructions to complete the integration.
- What information do I need to integrate my carrier account?
The required information varies by carrier but typically includes:
- Your carrier account number
- API keys or tokens
- User credentials (username and password)
- Billing information
Some carriers may require additional details. Synctrack will guide you through the specific requirements for each carrier during the setup process.
- Can I integrate multiple shipping carriers?
Yes, Synctrack allows you to integrate multiple carriers. This gives you the flexibility to choose the best shipping option for each order based on factors like cost, delivery speed, and destination.